Showing posts with label Crafting. Show all posts

Tuesday, August 22, 2017

Celebrating the Solar Eclipse


Thanks to our impending and unexpected move, I was not as prepared as I would like to have been for the solar eclipse, but we managed to have a pretty fun day.


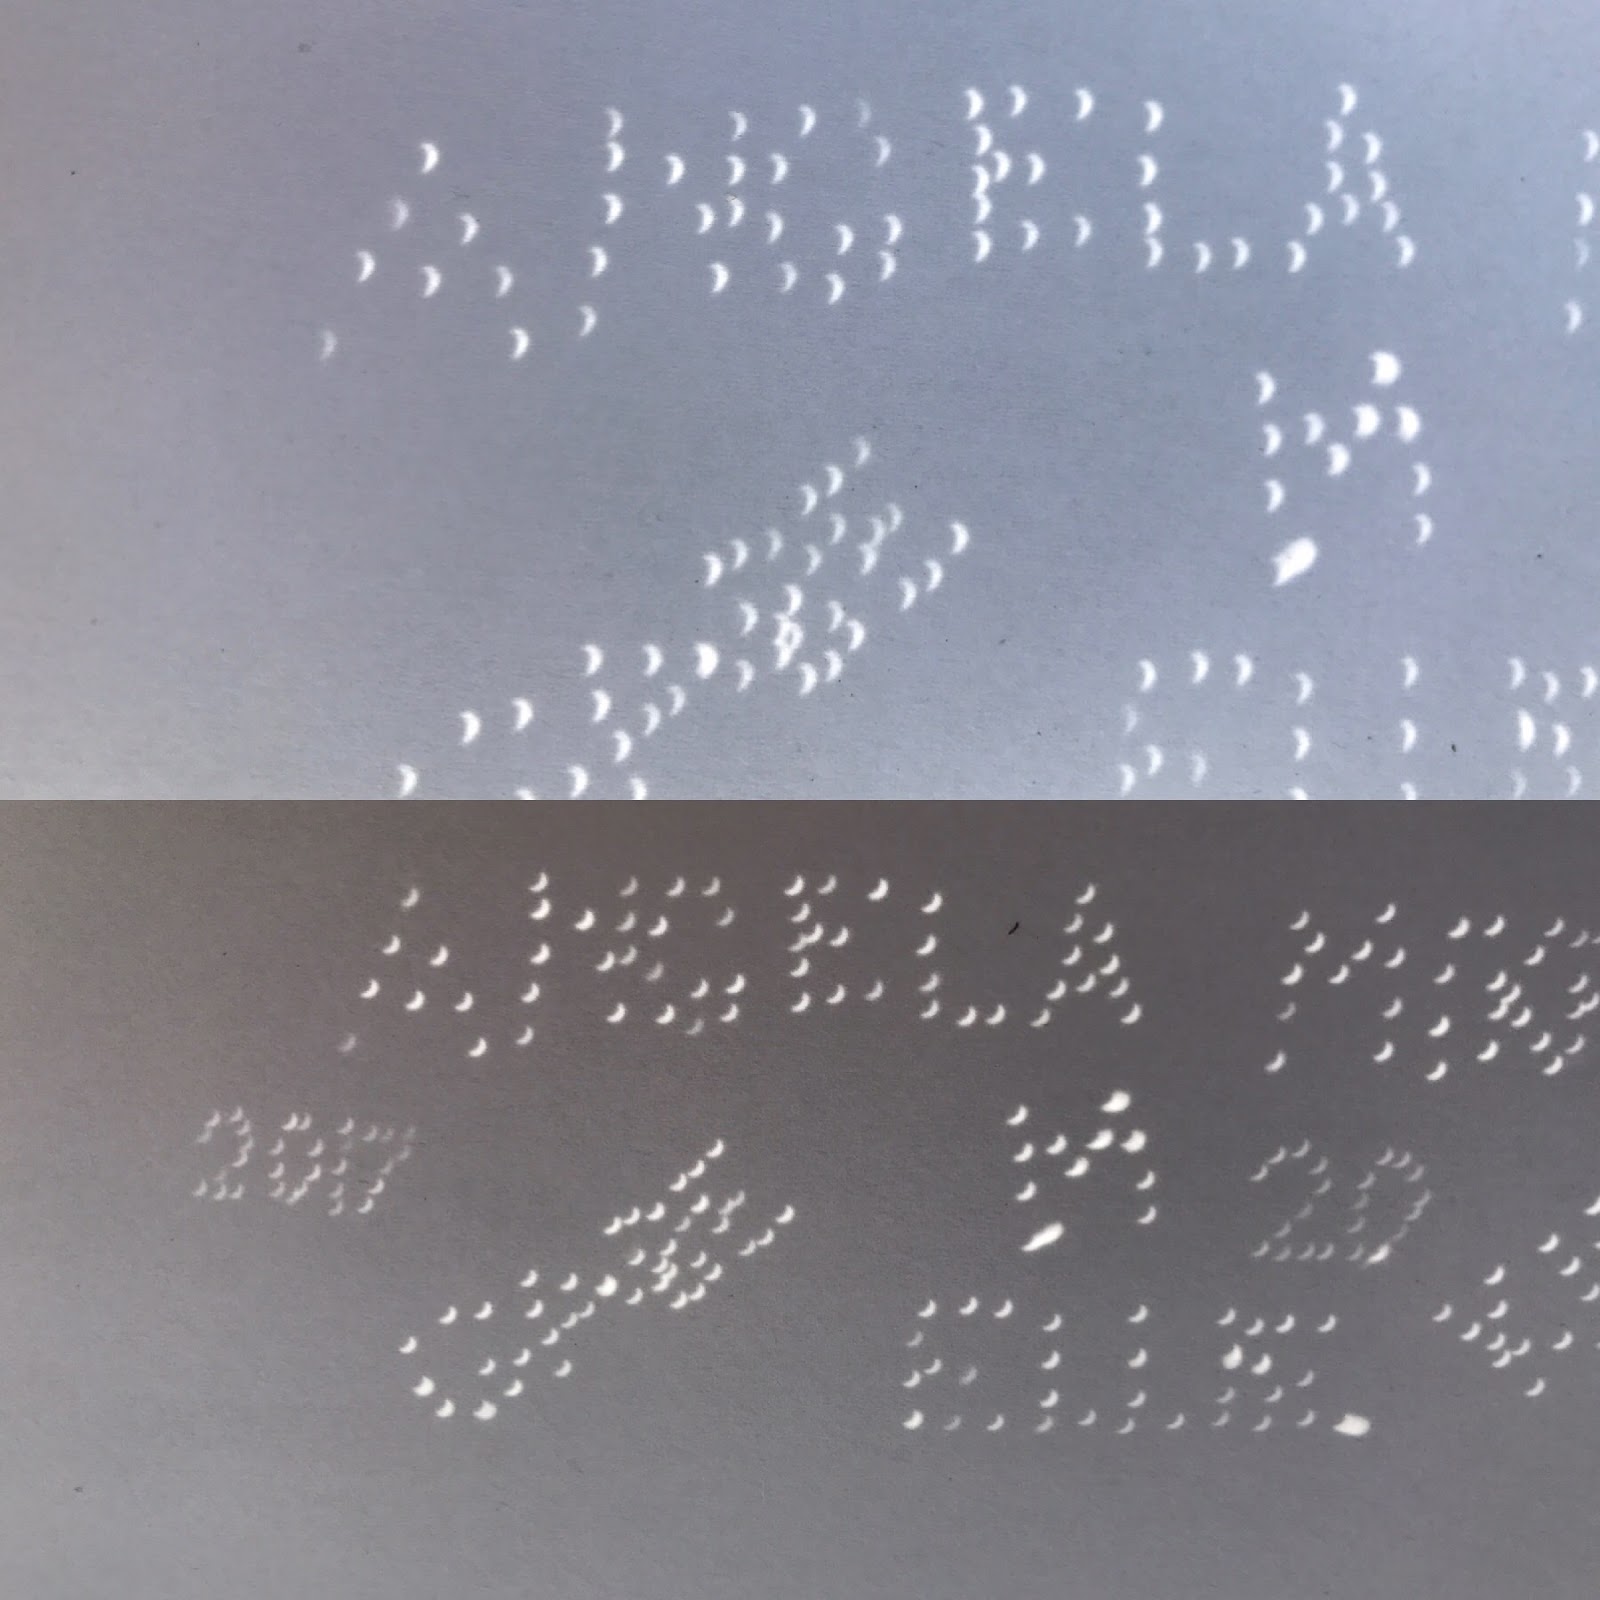
We had eclipse viewer glasses, but I wanted to make a pinhole viewer so I could take photos with my cell phone. I had forgotten to do that before today, though, so I had to be quick about it. I remembered seeing a picture of "2012" projected through a pinhole viewer, so I added a "2017" to mine. It was so cool, so I made more viewers with all the kids' names and my name and a heart and today's date. I only wish I'd had time to have the kids make designs.


It was neat to see how the images changed as the eclipse progressed.


While were outside viewing, my seven-year-old son and I made some observations about nature. When we first got outside, there were some ants out and about, and we received a few bites. After a little while, I noticed the ants were still around but not biting. Then the ants disappeared altogether. I sat in the grass, ant magnet that I am, and didn't see a single ant for about 45 minutes. Suddenly, they reappeared. A few minutes later, they started biting again, so we went inside, the best of the eclipse behind us. As we discussed our experience, my son pointed out that the breeze had stopped. He was right! There was no breeze a few minutes after we got out there, which I noted when I was able to stop adjusting my viewing paper because it was no longer moving. Shortly after we came inside, the breeze picked up enough to aggravate our motion-activated camera. Fascinating.


I wanted to make eclipse shirts, but I hadn't gotten to the store, so we made chalk art for the walls using cupcake liners as stencils.


When my hard-to-impress nine-year-old pulled off her stencil, she said, "COOOOOL!"


I stumbled upon an eclipse keepsake worksheet a few hours after the eclipse and had my children complete it. Nothing beats documenting their handwriting and spelling in these early years.
(I found the worksheet link in a HUGE list of resources by Life of a Homeschool Mom.)

Mikey, 7: "Geting to look at it" 
Ellie, 9: "it lookt like a fingernail moon"
(That's what she's always called a crescent moon)
Angela, 6: "See moon in front of sun"
(She wasn't the most willing participant in this.)
I wanted to do something fun and eclipse-y for dinner to finish out the day, but I didn't quite get there. Instead, we had eclipse cookies for dessert.


Overall, it was a good day for having been completely unprepared and getting less than 70% coverage. (And knowing we're moving to the path of totality in two weeks. Two weeks! How unfair is that?!)

What did you do to celebrate the eclipse? Were you in the path of totality? Did you blog about it? Share with me!

Sunday, May 27, 2012

Build a Monster

I joined a busy bag exchange group on Facebook.  I decided I wanted to finally start making the cloth quiet books for my kids that I've been planning, so I made pages for all my trades.  The first one I completed was for the preschool group.  The activity is a create-a-face monster made of felt.

I sewed the monster's head onto the page.  (I used muslin, but any cotton - any fabric, really - would work.)  I backed the page with a piece of felt and another piece of muslin.  I would like to have bound the edges, but the muslin I got was ridiculously thin and was trying to disintegrate.  Instead, I did a couple of messy zigzag stitches around the edge to hold it together and minimize fraying.  I made all the monster faces out of green or dark purple felt.  I used light purple thread for contrast.  I also did not take care placing the stitches because I wanted chaos to go with the monster theme.  (I apologize to the neat and orderly monsters out there.)

Since I was going for chaos, I picked a wacky, mustard-colored, animal-print fabric for the storage bag.  I put a button on the bag to keep the pieces in and attached it to the page with a sparkly orange ribbon.  The bag holds the three eyes (well, two sets and one single eyeball), three noses and three mouths I created to stick on the monster face.


Most of the members are not making cloth quiet books, so I added one or three buttonholes, whatever their preference, so that the page could be joined with other quiet book pages of other mediums on a ring or in a three-ring binder.

I also included directions:

In case you can't read that:

MONSTER FACES!

Includes: Monster Head, 3 Eyes, 3 Noses, 3 Mouths and Attached Storage Bag

Get creative and get scary!

Optional 2-person Game:
The first person designs a face with one of each part without telling the second person what it is.  The second person creates a face, trying to guess what the first person designed.  The first person tells the second person how many parts are correct and how many are wrong.  The second person tries to guess again, and the game continues until the second person guesses the correct combination of eyes, nose and mouth, counting how many tries it took.  The players switch roles, and the player who guessed with the fewest tries wins!

Sunday, March 4, 2012

Happy Valentine's Day!

I am so late on posting lately.  Since I just took down my decorations yesterday, I'll pretend that's the reason for the timing of this post.

I misplaced most of my Valentine's Day decorations from last year, so I had to buy new ones.  Fortunately, I realized this close enough to Christmas to take advantage of Christmas clearance and buy dozens of heart-shaped Christmas ornaments for $0.10-$0.30 each.  I also hit Jo-Ann, where I got last year's decorations, and picked up a few more.  My mom also got some of Jo-Ann's for Ellie's Minnie Mouse birthday party, so I ended up far from short on decorations this year.  Imagine next year after I find all the lost ones!  Scary!

I didn't really like how the decorations went up this year, but it was still fun to have hearts everywhere.  Plus,  to fill the space, the kids and I made a bunch of decorations that I laminated to reuse next year.  I didn't do anything fun for the kids, like the heart curtain in Ellie's doorway.  Still, the kids loved their goody bags - and the Hershey kisses within - enough that they didn't care.

Wall o' Hearts

Four Corners

Up close of Mikey's hand flowers

Up close of my bug garden, with contributions from Mikey
We drew grass and flower stems on the paper along with some flowers.  Then we stuck on foam flowers and bugs and some other cute bug stickers.

Our spring garden wall in its entirety
I added a few leftover Valentine postcards and the finger puppets the kids made

Tuesday, January 31, 2012

I Love Crochet

I just realized I never shared my crochet projects from way back in 2010.

My late grandmother taught me to crochet rows. She tried to teach me more, but I was an unruly tween who didn’t have the patience. I dropped it and picked it up many times over the years, but I finally got serious in the fall of 2010. I can’t understand patterns to save my life, but I am - apparently - very good at improvising. :o)

That said, I tried to follow a pattern for a gnome rug on Wee Folk Art.  I messed up and ended up with a circle with what looked like a flower petal. I decided to make the mistake over and over again to see if I could make a flower, and I did!  I call it "Oopsy Daisy."


I tried again, but I messed up around the sixth row, so I improvised. This was my first round project, unless you count my oopsy daisy.


I gave up on patterns for a while.

I was messing around during Mikey's therapy one day, and I thought I’d see if could make a T-Rex, and I did! It took me a little over a half hour to create, no pattern.


Last year I signed up with a group called "A Square a Day in May" (facebook group and Ravelry group)  They offered a pattern to follow for each day in May 2011.  You can probably guess I chickened out and never did a one.  I did save the info, though, and I plan to give it a go this year as part of "A Granny a Day 2012" (facebook group and Ravelry group) where we have no patterns, just the simple goal of crocheting a single granny square each day of the 366-day year.  I haven't started that, either, partly because I didn't find it until several days ago and partly because I'm chicken.

At the end of last year, I thought it would be fun to follow a video tutorial each day from my favorite crochet teacher: http://www.youtube.com/crochet.  I have yet to start that, too, mostly because I feel like I have more important things to do, even though it keeps drawing me in like a Siren song.  Her instructions are so clear that I know I could sew anything she showed me.  (She also has a facebook page: https://www.facebook.com/Crochetmania)

I know I need to just rip off the bandage and pick up a hook already.  Keep your eyes open for my successes (and failures) as I stumble along, trying to channel my grandmother through my hook and yarn.

Sunday, January 8, 2012

Candy Canes and Christmas Trees...Fine Motor Crafting

This post has been sitting unfinished for a few weeks.  I had a hard time remembering to take pictures of our candy-cane chaos (below).  Anyway, here are some ideas for next year...

I've been wanting to have the kids do ribbon Christmas trees, like this, and paper candy canes, like this.  With a few minutes of down time today, I whipped up the materials for whenever the kids and I had the chance to start crafting.


Thinking about the candy canes, I knew that gluing the stripes onto the cane would be a challenge for Mikey, so I decided we'd glue the stripes on the paper and then cut out the cane shape.  My next thought was I needed a cane-shaped stencil, but I remembered I have a couple dozen stencils in the pantry.  ;o)  In this craft, I used the following skills: gluing, placing, tracing and cutting.

First, I glued the white stripes on the red paper.  You could, of course, do this the other way around.  Make sure you fully coat the stripes so you don't have any separation after you cut out the canes.


Second, I turned over the paper and traced the candy cane several times.  I recommend laying the cane on an angle so you get diagonal stripes across your cut-out canes.  Also, be sure to leave generous tracing borders, especially if you're using skinny candy canes, to make them easier to cut out.


Third, cut out the candy canes.


I haven't decided what to do with ours yet.  I thought about gluing them onto paper as a candy-cane collage, maybe sponge painting the paper first.  I also thought about hanging them on yarn as garland.  I decided to wad up newspaper and use watered-down white paint to make snow.  When the kids' snowstorms were dry, they glued on the candy canes.  I think it's obvious which one was done by the two-year-old ad which was done by the four-year-old.


When I decided to do the ribbon trees, I knew I didn't have any ribbon (yes, I know this is a theme with me), so I cut strips of paper in varying lengths.  Since I wanted the trees to have a little sparkle, I threw shiny star stickers into the mix.  As I started the project, I decided our trees need stars on top, so I pulled out the glitter glue.  In this craft, I used the following skills: ordering, gluing, peeling and placing, and glue drawing.

First, give the strips to the child in a pile so that they have to order them from longest to shortest or shortest to longest.  Then glue the strips to the paper with the longest at the bottom and the shortest at the top.  Second, decorate the tree with the stickers.  Finally, use glitter glue to create a star on top of the tree.  (I'm sorry I don't have a better picture.  I always wait until nighttime to take these pictures, and the lighting just doesn't work.)


Ellie decided hers needed "branches" at the top 
Mikey needed surprisingly little direction for this!

Saturday, November 19, 2011

Fly, Monarch! Fly!

Let me start by saying how we came to read this book tonight, a story that illustrates what I love about unschooling.

Ellie was playing with one of her ladybug pillows when she started asking questions: "What do ladybugs turn into?  What are they before they turn into ladybugs?"  Well, as it happens, I have a book about the life cycle of a ladybug that I picked up on a recent trip to the library in search of butterfly books, another of Ellie's requests.  I thought this book was wonderful.  Here is more information about it, including my review.

After we finished that book, Ellie insisted on reading a few more library books, including Fly, Monarch!  Fly!  I really liked this book as well - I linked my review, but I like the extras the book contained, like a butterfly sandwich recipe and a craft.  Ellie, of course, was all about the craft, so we did it after dinner.

It was a simple craft: Sketch a butterfly on orange paper, color and cut out, cut out and affix antennae, and affix dots and magnet.  The sketch part was too hard for Ellie, so I outlined her butterfly, but she did the rest, short of cutting out the antennae.


Ellie's is a bit more abstract

I decided mine needed eyes

Friday, November 11, 2011

Hand trees and thumbprint leaves

I saw this craft on Pinterest, or at least I saw each part of it in other crafts.  We had a lot of fun, although the kids' didn't turn out quite like my vision.

Inspired by a rogue print on Ellie's, I added falling leaves to mine

Ellie was so happy when I pointed out her falling leaf that she decided they should all be falling

Poor Mikey's looks like the victim of a forest fire